I explored After Effects and Final Cut to see how to create different titles:
First, i went into After Effects, clicked on 'Composition' and then 'New Composition'
From there i clicked Ok and came up with a blank canvas for me to use.
I right clicked onto the canvas which gave me this selection.
I chose 'New' then clicked 'Solid' as i wanted to make the background of my canvas black.
I went to the section that says 'Colour' and changed it to black.
This is what you should get.
I then clicked on a little square that has lines on all sides of it which gave me these options. I wanted the grid that showed me where the center is so i could place my title dead in the middle. For this i clicked 'Title/Action Safe'.
This is what it will give you, which is a grid that will help you point out the center of where you want your text to go.
At the top left corner there are little icons. One of the them is a giant T which stands for the text tool. Click this button.
This should give you something like this text box. It is best on the right hand side to change the colour to white as it's standard function is black.
I then wrote 'crime thriller tester'.
This i then positioned in the middle of the frame.
If i wanted to changed the text, i would highlight the text,
and use the right hand section to use the different fonts. Here is the drop down bar to all the other fonts you could use. This will change the text automatically once selecting.
To animate this text, go to the top of the screen to 'Animation' and click on "Browse Presets'. This will open a program called Bridge.
It will show you a selection like this.
Within those selections, find the one that says 'Text' and click on this.
This will bring you to another selection to which you can edit your text to animate however you desire.
By clicking on a selected animation you can get a preview on the right hand side of what this animation does and then click to add it to your text.
Now on Final Cut i used a bit of a sequence and put it in my timeline.

On the middle screen there are little symbols on the bottom of them.
The symbol that says 'A' in a film like box is the tool we will use for our text, we scroll down to text.
Then we select the word text in the next section.
This will what you see on the screen.
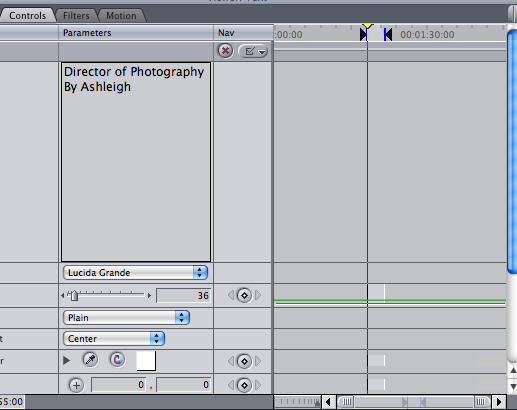
At the top of this box there is a tab called 'video'. Drag that to the left hand side so you can see your text change. On the right side click on 'controls' and this is where you will edit your text.
Once finishing writing your text click outside the box and it should automatically change.
From there i changed the text and the Italics of the font.
You can chose from a variety of fonts here.
Then drag the segment you want and put it on top of your piece you want the text to go on.
It should look like this.
To animate this text, go to 'Window' and 'Effects' if you haven't already got the effects on the left hand side.
These are the options that come up.
We go to 'Video Transactions' which gives us this list.
The we click into 'dissolve' which gives us a load of different dissolves.
I'm just going to use a simple cross dissolve so i click on it.
I then drag it onto the end of the top title.
And again on the beginning of my title.
Even though you can't see it as it is a moving image i have taken stills of the words crossing onto the screen off again.